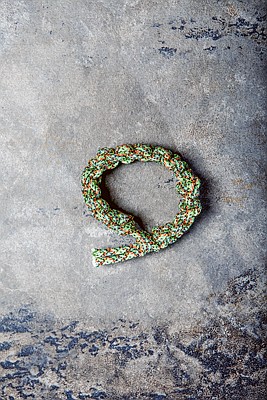
Most often seen strapped to the wrists, necks or backpacks of hikers and members of the military, paracord bracelets - also known as "survival bracelets" - provide wearers with at least 6 feet of strong 550 parachute cord in case of an emergency.
There are myriad colors of this lightweight nylon rope available online, and for as low as $1.95 for 25 feet, it's a no-brainer that DIY is the way to go. Plus it's kind of therapeutic...like knitting, but manlier.
WHAT YOU NEED
• 6-8 feet of 550 parachute cord (depending upon the size of your wrist)
• Scissors
• Lighter
DID YOU KNOW?
Parachute cord was originally used by paratroopers as suspension lines for their parachutes during World War II. Once in the field, paratroopers found this cord useful for many other tasks.
JUST IN CASE
Seven ways to use your survival bracelet:
1 Set up a clothes line to dry your clothes,2 Shoelace replacement, 3 Set up shelter, 4 Set up traps, 5 Repair damaged clothes or equipment, 6 Tourniquets, 7 Taken apart, the small strands that make up 550 parachute cord can be used as fishing line.
WHAT YOU DO

1 Determine the size of the bracelet by attaching it loosely around your wrist. The inner core of the bracelet should be the length of your wrist around twice, but you might want to add another inch to your measured wrist length just for wiggle room and comfort.
2 Once you've measured the length, tie the end of the bracelet with an overhand knot. (Tutorials for this knot are available online.)
3 Measure 6-8 feet of cord to be used for the outer part of your bracelet. Lay the core of your bracelet on a flat surface. You can also pin it to a cork board in your lap to make the weaving process easier. Take your long piece of cord and fold it in half evenly, then place that behind the vertical cords.
4 Cross the right cord over the vertical cords to the left side to make a loop.
5 Take the top left cord and pull it down over the bottom cord then under the vertical cords and up through the loop on the right.
6 Pull the ends to tighten the weave.
7 Start your next weave by crossing the left cord over the vertical cords to the right side to make a loop. Take the top right cord and pull it down over the bottom cord then under the vertical cords and up through the loop on the left. Pull the ends to tighten.
Instructions adapted from operationgratitude.com, which uses volunteer power to send an annual 100,000 care packages filled with snacks, entertainment items and personal letters of appreciation - as well as paracord bracelets - to U.S. Service Members deployed in hostile regions, to their children left behind and to wounded warriors, veterans and first responders. Visit them online for more information on the organization or how to volunteer.
8 Repeat steps 4 and 5, alternating between right and left sides to make the weave consistent, until you reach the bottom of the inner part of the bracelet.
9 Turn the bracelet over and tuck in ends of the cords into the underside of the bracelet.
10 Open the ends of the cord to reveal the small strands underneath. Cut off as much of those as possible. (The outer cord burns easier without the inner strands.) Burn the ends with a lighter.
11 When the ends start to melt, turn the bracelet over and press the melted ends against the side of the lighter (or on another hard surface) to seal the ends together. After a few seconds, the melted paracord will harden. Turn the lighter (twist it) to release the bracelet from the lighter.