Photo Gallery
(Solar) fusion cuisine: Using the power of the sun to cook on the cheap is a patience-testing novelty
Build your own
Interested in harnessing the power of the sun to fuel your culinary endeavors via a solar oven? Why not build your own? Using the following highly rated plans by Instructables.com user Aleutianwind, you can assemble a home-made oven for less than $10.› Supplies: A piece of tempered or pane glass such as found in a picture frame, the larger the better; two cardboard boxes, one of which is two to three inches larger than the other; a third cardboard box for additional parts; a roll each of duct tape and aluminum foil; newspaper; white glue.› Place the smaller box on top of the larger and trace the outline of the smaller box atop the center of larger box’s closed flaps. Trim the flaps to create a snug hole for the smaller box to sit within.› Place the smaller box in the center of the larger box, fill the gap between the boxes with crumpled-up newspaper and tape the edges of the boxes together to create a uniform seal over the paper-insulated interior.› Using white glue, line the interior of the smaller box with aluminum foil.› Make a lid to cover the cooking area by applying a length-wise double layer of duct tape to create a hinge between the back edge of the picture frame and the box.› Break down and flatten the last box and cut out four trapezoidal panels. The panels’ smaller side should be the same size as the larger box. The larger side of each panel should measure two to three inches wider than the smaller end.› Apply glue to one side of each panel and place it, glue-side-down, on a sheet of aluminum foil. Once the glue dries, trim the excess foil and apply duct tape around the edges to minimize tearing.› Tape the four panels together so their foil-covered sides face inward. When heating the oven, align the smaller end of the reflection panel array over the glass door and tape it down to minimize movement during cooking.
In 2009, Duke Cumbelich and his family were living in Western Kentucky when a winter storm produced thick accumulations of ice that shut down power to their house.
A military vet with experience as an emergency medical technician, firefighter and long-time survivalist, Cumbelich knew the outage offered just the opportunity he wanted.
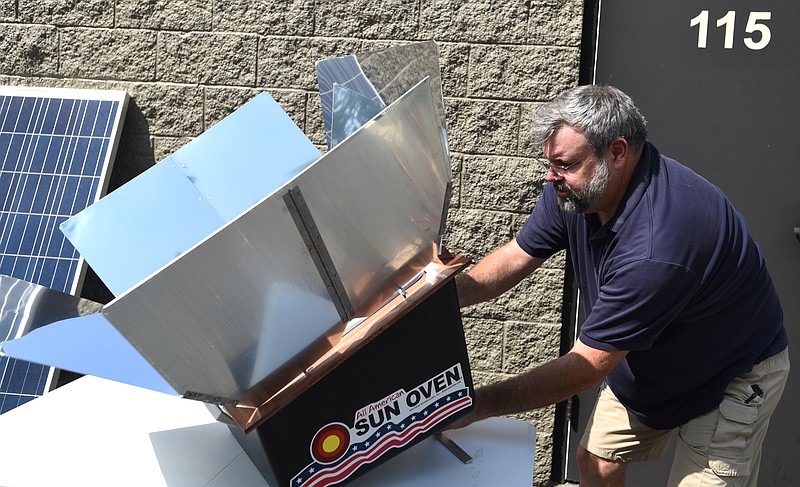
Using plans he'd gotten off the internet and power tools hooked up to his home's backup generator, he assembled a home-built solar cooker out of lumber, sheet metal, aluminum foil, Styrofoam and Plexiglas. Then he positioned its array of reflector panels in line with the winter sun - and waited.
"We used it really because we wanted to, to test it out," says Cumbelich, who now owns outdoor equipment store P5 Preparedness off East Brainerd Road. "We used it to boil water and to cook some pre-prepared, long-term storage foods like a [ready-to-eat meal]. It was very effective."
In 90 minutes, enough energy is imparted by sunlight hitting the earth's surface to satisfy the power consumption of the entire planet for a year, according to a 2006 report by scientists with the Department of Energy, California Institute of Technology and Argonne National Laboratory.
The possibilities inherent in that amount of untapped power have been the target of scientific inquiry for centuries. In the mid-18th century, Swiss scientist Horace Benedict de Saussure created the first device that redirected, collected and retained the heat generated by sunlight. De Saussure's pioneering solar collector achieved an internal temperature of 228 degrees using an insulated pine box lined with cork and topped by three layers of glass.
Modern-day solar cookers retain the fundamentals of de Saussure's design but can achieve even higher temperatures thanks to the incorporation of reflection systems such as parabolic mirrors and metallic panels to redirect the maximum amount of solar energy directly onto a cooking vessel or into an insulated cooking area.
Solar cookers are available in a variety of configurations, including do-it-yourself projects similar to the one made by Cumbelich. These homemade models consist of readily accessible materials and generally require minimal time and financial investment to assemble. Some of the simplest can be made via minute alterations to a pizza box or potato chip can.
A range of pre-assembled cookers also are available online beginning at $50 and ranging to thousands of dollars. These tout their ease of use and more resilient construction over homemade solar ovens. Manufacturers of commercial models, such as the GoSun Station and GoSun Sport, claim to have achieved internal temperature of 550 to 600 degrees, hotter than most conventional gas or electric ovens.
Online videos demonstrating solar cookers show them being used to prepare a variety of meals, from brownies and bread to pork roasts and pizza. Regardless of their construction, users of solar cookers agree that sunlight isn't the most reliable fuel source. Although they can be used year-round and aren't generally affected by ambient temperature, solar cookers only work during daylight hours, and the movement of the sun and environmental conditions such as cloud cover can slow down cooking and limit the maximum achievable temperature.
While some may see solar cooking as a fun novelty bested by the reliability and ease of traditional cooing methods, Cumbelich says solar cookers are popular with his clientele at P5 Preparedness. Even though they're special order items, Cumbelich says the cookers sell quickly and tend to resonate with people who are interested in off-the-grid living.
"It's more for people who are interested in self-reliance," he says. "They don't want to have to be connected to an electric source or a gas source to cook.
"It's for clean living and environmentally responsible folks. It's not just hippies. It's just people who don't want to be attached to the grid. It goes beyond just preparedness or just survival. It's just smart."
Contact Casey Phillips at cphillips@timesfreepress.com or 423-757-6205. Follow him on Twitter at @PhillipsCTFP.
Peanut Butter Chocolate Cookies
Now that you’ve built a solar oven, try this recipe for the novice solar baker from Eartheasy.com’s Robin Jacobs.1/2 cup salted butter (1 stick)1/2 cup unrefined sugar or brown sugar1 cup salted peanut butter1 tablespoon molasses3 large eggs1 teaspoon vanilla extract or 1/4 teaspoon powdered vanilla bean1/3 cup coconut flour1/2 cup tapioca flour1 cup dark chocolate chipsHeat solar oven to around 300 degrees. Allow all ingredients to come to room temperature.Cream the sugar into the butter with a sturdy wooden spoon. Add the peanut butter and work it into the butter mixture. When smooth, add molasses, vanilla and eggs, one at a time, maintaining a smooth consistency.In a separate bowl, combine the coconut and tapioca flours. Dump the flour mixture into the wet ingredients and combine until smooth, then stir in chocolate chips.The dough will be soft and gooey. If desired, firm it up by refrigerating for half an hour.Spoon dough onto either a baking parchment paper laced directly on your oven’s rack or onto a buttered cookie sheet. When spooning, flatten each cookie gently with a buttered spoon since they won’t spread much on their own.Cookies are done when the surface appears dry and firm to the touch, about 30 minutes, but cooking time may vary based on the available light.Recipe prepares two dozen three-inch cookies, but cooking may need to be done in batches, depending on the size of your oven.