Stuffing, gravy, cranberry sauce or Brussels sprouts: It's not Thanksgiving without a supporting cast of dishes. Let us help you perfect them, so every part of the meal shines.
Stuffing and Dressing
For lovers of stuffing and dressing, Thanksgiving may be the apex of the year, though those dishes are welcome on the table anytime.
Although the two terms may be used interchangeably, as we do here, stuffing is generally understood to be cooked inside the cavity of the turkey, while dressing is baked alone in a casserole or other shallow dish. As a result, stuffing is tender and moist, suffused with the juices and any rendered fat from the bird. Dressing has a crisper top from being exposed more directly to the heat of the oven.
Stuffing
If you love the brawny flavor of poultry juices mixed with your side dish, or if you're simply a traditionalist, stuffing the turkey is the way to go.
Daily countdown
Need some help getting everything ready for your Thanksgiving feast? Nov. 12 through Nov. 22, we’ll offer tips, advice and recipes.› Sunday: Thanksgiving tools› Monday: Choosing a turkey› Tuesday: What to drink› Wednesday: Sumptuous sides› Thursday: Beer and turkey pairings› Friday: Setting the table› Saturday: How to be a good guest› Nov. 19: Tips for your turkey› Nov. 20: Buffet essentials› Nov. 21: How to snag the wishbone› Nov. 22: Ideas for your leftovers
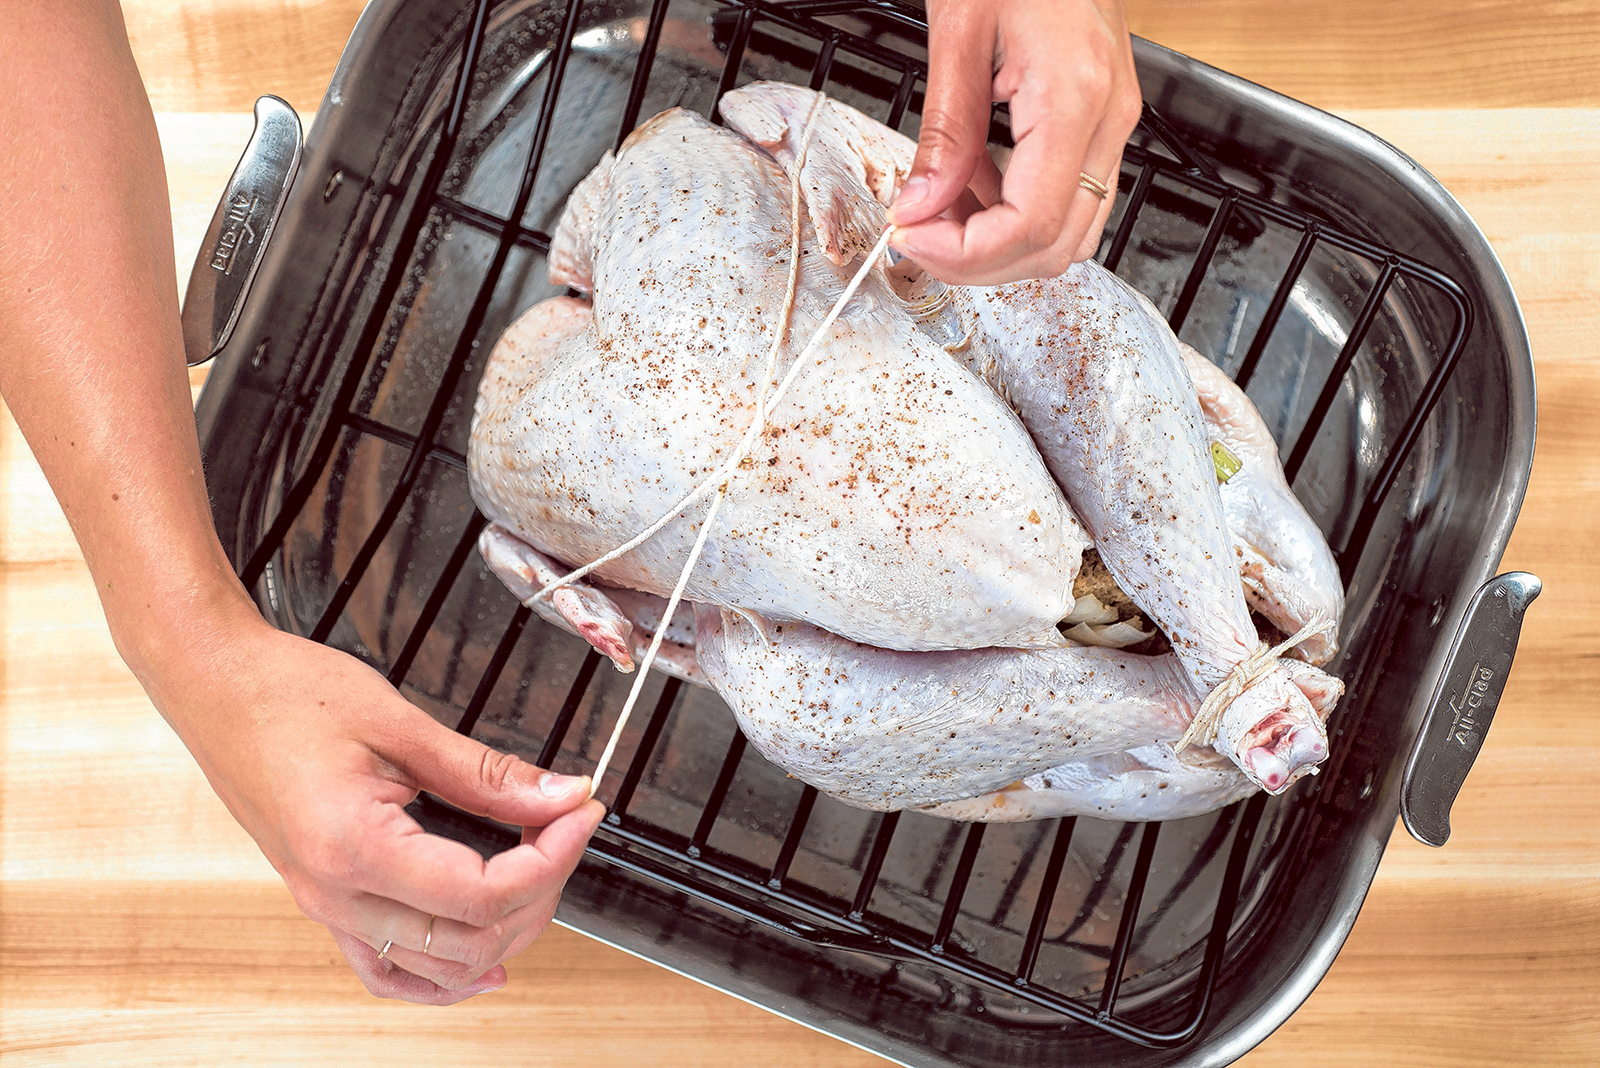 If you don't stuff your turkey, you really don't need to truss it. But if you do stuff your bird, trussing helps keep the stuffing in its proper place, especially when you are moving the turkey from the roasting pan to the cutting board. (Karsten Moran/The New York Times)
» Stuff the turkey just before it goes into the oven. We know you want to do as much ahead as possible, particularly on Thanksgiving, but stuffing ahead of time encourages the growth of bacteria. Don't do it. This said, you can make the stuffing up to four days ahead and keep it in the refrigerator, then put it inside the bird just before roasting.
» If your stuffing recipe calls for shellfish or turkey giblets, the U.S. Department of Agriculture recommends that these be fully cooked and kept hot before they are put inside the bird. So stir them into the mix immediately before stuffing the turkey.
» Stuffing expands as it cooks, so fill the cavity loosely.
» If you're going to stuff your bird, you should truss it, or at least tie the legs together to keep the stuffing from falling out.
» Bear in mind that stuffed turkeys take longer to cook than unstuffed ones.
» Both the turkey and the stuffing need to be cooked to 165 degrees before they are safe to eat. Usually the bird gets there before the stuffing does. To avoid overcooking the turkey, pull it from the oven once the flesh hits the desired temperature. Then spoon the stuffing out of the cavity and into a baking dish and return to the oven (or stick it in the microwave). Continue cooking until the stuffing reaches 165 degrees.
Bread Stuffing: Any bread, from soft white sandwich loaves to chewy bagels to crusty sourdough rye breads, can be turned into a stuffing or dressing. No matter what kind of bread you use, it will absorb more of the seasonings if it is stale and dry. You can either buy the bread several days to a week in advance and let it dry out at room temperature, or cube it and dry it out in a low oven (250 degrees) until thoroughly arid.
Or consider making your own bread for stuffing. Cornbread comes together especially quickly, and you can control the amount of sugar in the recipe, depending upon whether you like it sweet or savory.
Easy breads like biscuits, soda bread, no-knead bread and white sandwich bread all make great stuffing, too. Bake them several days ahead so they have a chance to get stale. Or bake them months ahead and freeze, then thaw them and let them dry out before making stuffing.
Grain Stuffing: Bread stuffing is the classic choice at Thanksgiving, but you could use rice or other grains such as quinoa, farro or barley. Not only are grain stuffings elegant and refined, most also are gluten-free.
Grain stuffings don't need to adhere the way bread stuffings do, so you don't need to bind them with egg. Basically, your aim is to make a tasty rice pilaf or grain salad, then cook it again inside your bird, which will give it an even more complex flavor rich with drippings.
You can use classic bread stuffing aromatics (sage, celery, onion), or improvise another flavor combination. Chances are that as long as it tastes good on its own, it will taste even better after taking a turn inside the bird.
Wild rice goes particularly well with the earthy autumnal flavors of a Thanksgiving meal. Or try sticky rice for something unexpectedly terrific.
Dressing
Dressing is baked outside the turkey, which means it can achieve an appealingly crisp, browned top - a nice textural contrast to the softer layer underneath. And, with your dressing out of the way, you can add aromatics such as lemons, garlic and bunches of herbs to the turkey's cavity for additional flavor. (Another bonus: An unstuffed bird will roast more quickly than a stuffed one.)
» You can turn any stuffing recipe into a dressing by simply baking it outside the bird. Spread the mixture in a shallow pan and bake until the mixture reaches 165 degrees. Dressing is pretty forgiving, so feel free to bake it at whatever temperature you need for other dishes you're cooking.
» Vegetarians take note: Because it doesn't touch the bird, dressing can be utterly meat-free. A rice stuffing with walnut and pears is one good option.
» On the opposite side of the spectrum, you can add turkey stock or chicken stock, crisped poultry skin, schmaltz and/or diced cooked gizzards, liver and shredded turkey neck to the dressing to give it a meatier flavor.
» If you've got enough extra turkey skin, drape it over the top of the dressing before baking. The skin will turn into poultry cracklings and render its luscious fat all over the dressing. Outstanding. If the skin isn't crisp when the stuffing is done, run it under the broiler for a few minutes to finish. (You can often special-order turkey skin from your butcher - chicken skin will work, too - or trim off the extra skin at the turkey's neck when you are getting it ready for the oven.)
» If you like a deeply golden top, dot the top of the dressing with butter before baking. And if the dressing cooks through before the top is brown, run it under the broiler for a minute or two before serving.
Gravy
Good gravy is more than just a sauce for the turkey. It brings all the elements of the Thanksgiving plate together, elevating mashed potatoes, stuffing and turkey. You can use the classic method for making gravy, whisking it together at the last minute using the turkey pan drippings, or you can make the gravy ahead, then spike it later with the flavorful drippings.
Before You Start
» It's helpful to have a fat separator, which looks like a measuring cup with a spout. It lets you pour off the gravy and leave behind excess fat.
» You can use a wooden spoon to make gravy, but a whisk makes things smoother.
» For silky gravy, or for added insurance against lumps, strain your gravy before serving. Have a sieve on hand.
» Drippings from brined and kosher turkeys may be too salty to use in gravy, particularly classic pan gravy. Drippings from dry-brined turkeys work in any gravy.
The Stock
Whether you're making classic last-minute gravy or one ahead of time, remember this: Great gravy can come only from great stock. It's absolutely worth the time it takes to make your own turkey or chicken stock from scratch, but there are tricks to fortifying store-bought stock.
Homemade: To make your own stock, you need poultry bones, either cooked or raw or a combination. Some of the bones should have meat on them, but most can be picked clean. Two or 3 pounds of bones is plenty, but even 1 pound will give you enough stock to make gravy. If you've got turkey giblets from your bird (heart, gizzard, neck, anything but the liver), throw them into the pot with the bones and a big pinch of salt.
Add some vegetables and aromatics: a carrot, a leafy celery stalk, an onion and/or leek, a few cloves of peeled garlic, a bay leaf and/or some parsley stems, and a teaspoon of peppercorns.
Pour in enough water to cover all the solids by at least 2 inches. Then bring it up to a very gentle simmer and let it bubble for a couple of hours. Strain everything, pressing down on the solids, and chill for up to three days, or freeze for up to six months.
Store-bought: If making your own is out of the question, you can come pretty close with a good-quality poultry stock bought either from a butcher shop or a specialty shop (preferably one made in-house). You'll often find pre-made stocks in the freezer case.
If the supermarket is your only option, the rule for canned or boxed stock, or stock sold in Tetra Paks, is to taste before using. If it's terrible, you're better off with a bouillon cube and water, which is a low bar but marginally better than water. As a last-minute fix for weak stock, simmer it with the turkey giblets for an hour or two. That will fortify it.
The Roux
A roux, which thickens a gravy, is made with equal parts fat and flour. If you're making classic pan gravy, you'll use the fat in the roasting pan. If you're making gravy ahead of time, use butter, melting it in a medium pan over medium heat.
Gently whisk the fat and flour together for at least five minutes, long enough for the raw taste of the flour to disappear. Keep cooking, whisking all the while, until the roux has reached your desired color.
The color of the roux determines what its flavor will be, and how effective it will be as a thickening agent.
A white or light roux, in which the flour is cooked briefly, will give you a mild mixture that lets the flavor of the poultry dominate. It's also the most effective thickener. A dark, mahogany-colored roux adds an intense, caramelized, nutty flavor to the gravy, but sometimes at the expense of turkey flavor. Or strike a balance and cook the roux until medium-brown, which will give you a nuttiness that still allows the poultry character to shine.
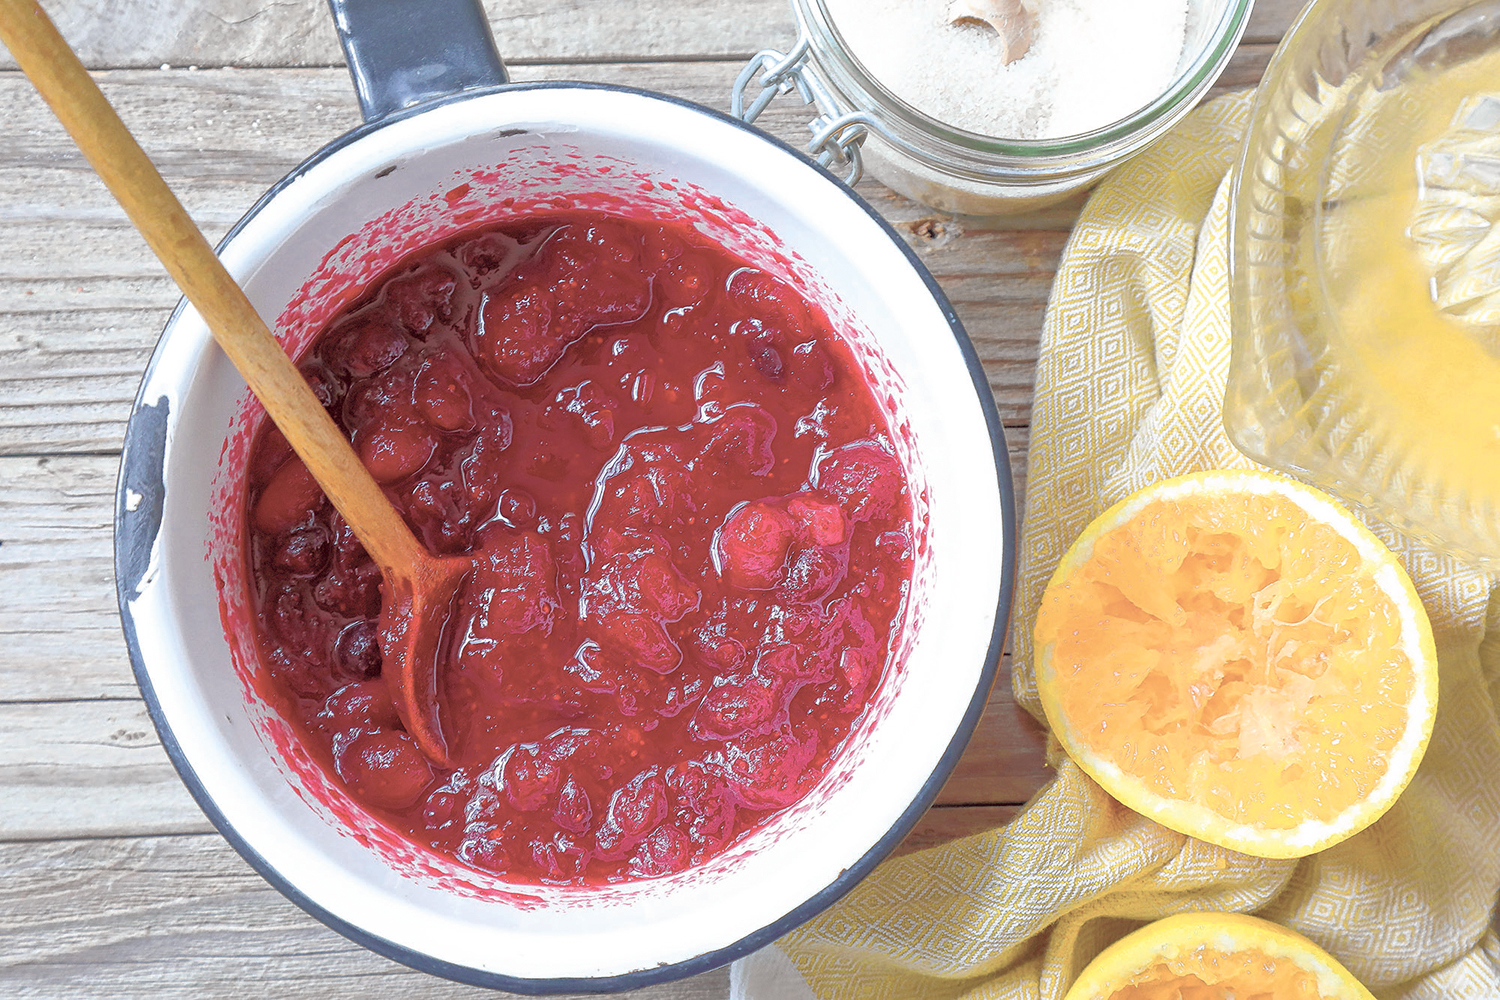 For many, cranberry sauce is a Thanksgiving must. (Jim Wilson/The New York Times)
Cranberry Sauce
Classic Cranberry Sauce
A cranberry sauce, sweetened with sugar and seasoned with orange juice, is the most traditional approach. Our recipe for basic cranberry sauce (recipe follows) is easy to follow and practically foolproof, but there are a few things worth keeping in mind, no matter what tried-and-true recipe you follow.
» If you're using frozen cranberries, there is no need to defrost before cooking.
» Keep an eye on the sauce as it cooks. You'll want to start thinking about pulling it off the stove as soon as the first few cranberries start to burst. For the best texture, you want some of them to break open, but others to remain whole.
» The sauce can be made up to a week in advance; keep refrigerated, and do not add the nuts until Thanksgiving Day, a few hours before serving.
» If your sauce doesn't set after you've chilled it, put it back on the stove and simmer it for another 5 minutes or so, then let it cool and chill. That should do the trick.
Cranberry Jelly
A shimmering cranberry jelly need not come from a can. This homemade version is bracing, syrupy and pleasingly wobbly, and a touch of Lillet makes it sophisticated.
To make it, combine 1 1/2 cups Lillet, 1/2 cup orange liqueur (such as Grand Marnier) and 2 cups sugar in a heavy saucepan. You could also add 2 tablespoons juniper berries for a dash of spice. Bring to a boil over medium-high heat.
Add 2 (12-ounce) bags of fresh or frozen cranberries (about 8 cups) to the pot and return to a boil. Reduce the heat to low and simmer until all the cranberries burst and are very soft, at least 10 minutes.
Strain the sauce into a bowl through a sieve, pushing on the solids with a rubber spatula to extract all the liquid. Discard the solids. Stir the liquid and transfer to a pretty serving bowl or a mold. (A funnel or liquid measuring cup with a spout can be useful for transferring without splashing the sides.)
Cover and refrigerate. It will firm up within a few hours, or can be made several days ahead. Keep refrigerated until ready to serve.
If you chilled the jelly in a mold, you'll need to turn it out. To do so, place the mold in a large bowl. Carefully pour hot water into the bowl so it comes up the sides of the mold, melting the jelly just enough to release it. After 3 minutes, try unmolding the jelly onto a serving dish. If it doesn't come out, return it to the bowl and try again 2 minutes later. Repeat until the jelly is released. If necessary, return it to the refrigerator to firm up before serving.
» Make it nonalcoholic, or play with the flavor: Use 2 cups of orange juice, red wine, port or Madeira instead of the Lillet and the orange liqueur.
» Make sure the water you use to unmold your jelly is quite hot, not just warm. You want to melt the outer jelly layer enough so that the whole mold can slip right out.
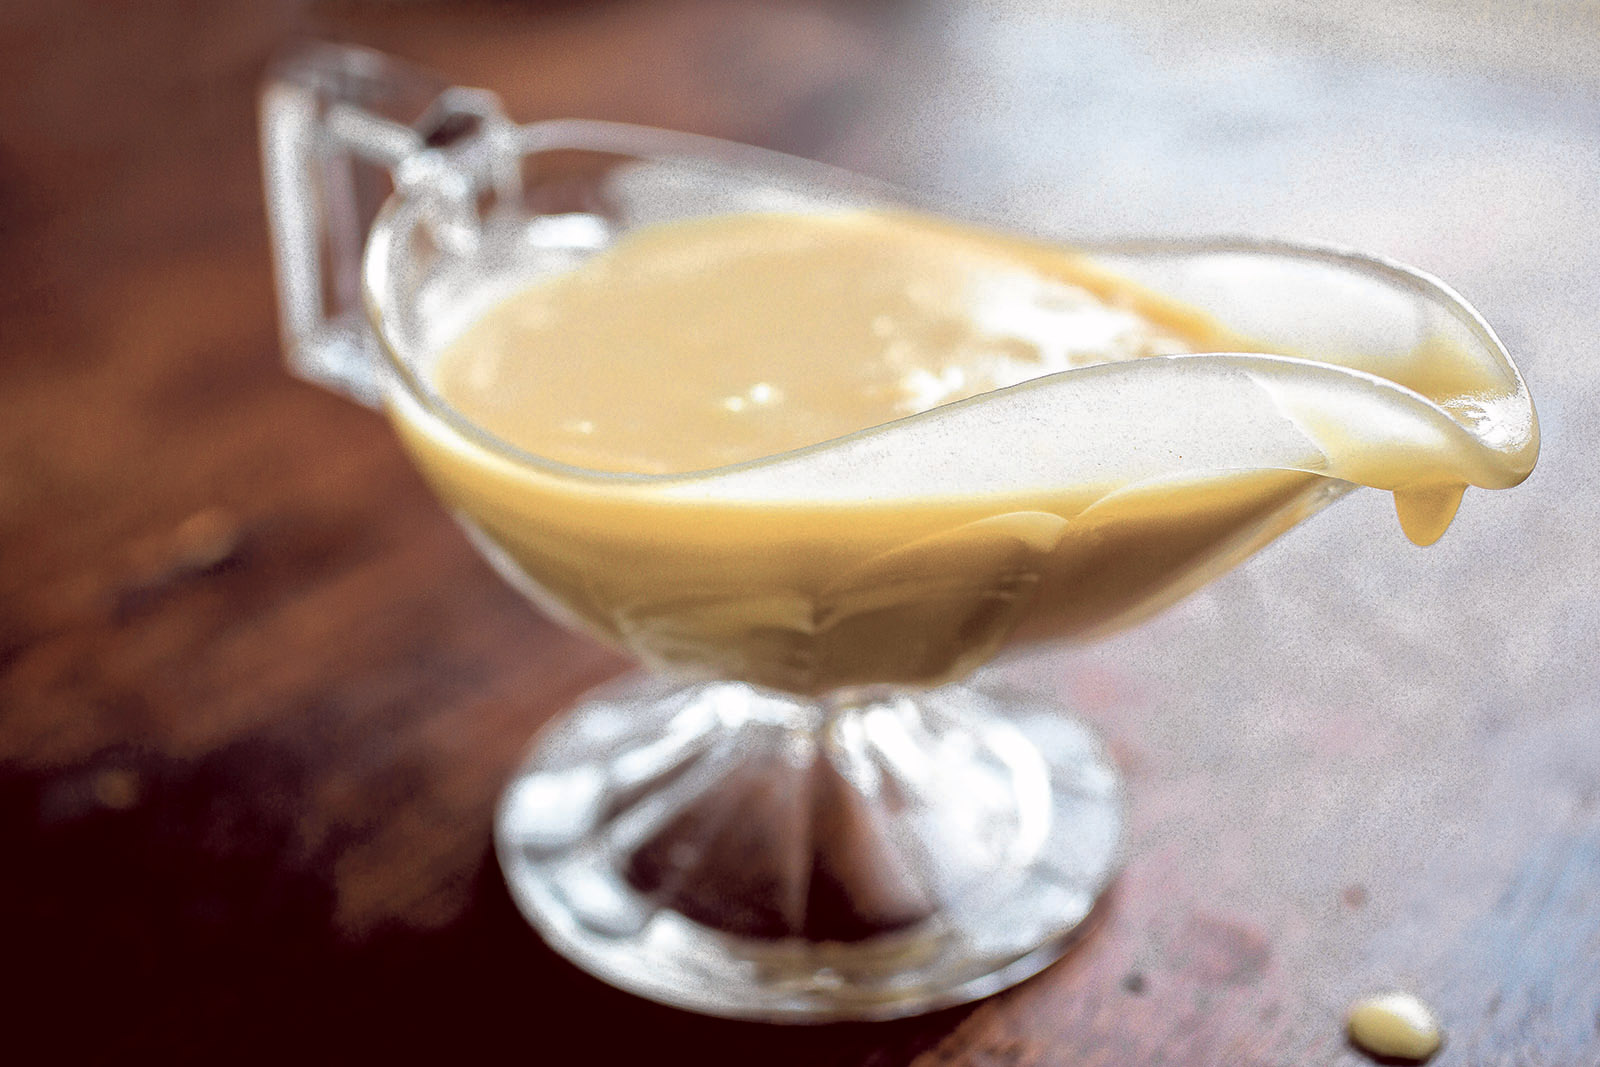 Pan gravy lends itself well to cooking in the very pan in which you've roasted your turkey. (Andrew Scrivani/The New York Times)
Classic Pan Gravy
Time: 25 minutes
Yield: 5 to 6 cups
Here is a simple, elegant pan gravy that lends itself well to cooking in the very pan in which you've roasted your turkey. It calls for whisking flour with the fat in the bottom of the pan to create a light roux (no lumps!), then hitting it with stock and wine, salt and pepper. Some may wish to add cream, or other spices. Decant the gravy into a warmed boat or beaker, rather than into a cold one, and serve immediately.
7 tablespoons turkey fat, left in roasting pan
6 tablespoons flour, preferably instant or all-purpose
1/2 cup white wine
4 to 5 cups turkey stock or chicken stock
Kosher salt and black pepper
Pour off all but 7 or so tablespoons turkey fat from the roasting pan, and set the pan on the stovetop over medium heat. Sprinkle the flour over the fat and cook, stirring constantly, until the mixture is golden, 8 to 10 minutes.
Increase heat to medium high and add a little white wine, whisking as you go to let it reduce. Slowly add stock, stirring constantly, until the mixture is smooth. Cook, continuing to stir, until the gravy has thickened, approximately 8 to 10 minutes. Season to taste with salt and pepper.
- By Sam Sifton
Bread Stuffing
Time: 1 hour
Yield: 6 to 8 cups
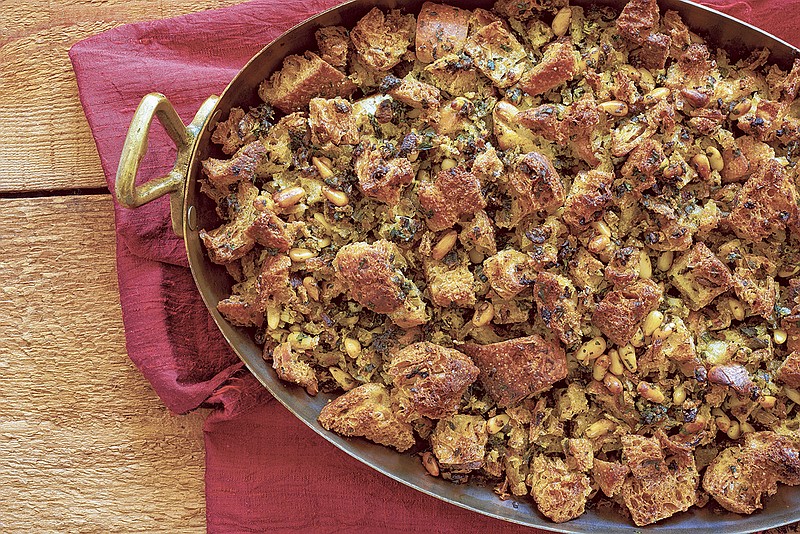
Mark Bittman writes that this bread stuffing, based on a James Beard recipe, has been a staple on his Thanksgiving table for decades. First, you make fresh breadcrumbs: Just whiz a few cups of slightly stale cubes of decent bread (crust and all, unless it's superhard) in a food processor. Keep the crumbs very, very coarse. Cook them with plenty of butter or olive oil, and good seasonings. Baked in a pan, this is delicious, with or without gravy. You could use it to stuff the turkey if you'd like - but once you've tried it cooked on its own, you won't look back.
1/2 pound butter (2 sticks)
1 cup chopped onion
1/2 cup pine nuts or chopped walnuts
6 to 8 cups coarse fresh breadcrumbs (see tip)
1 tablespoon minced fresh tarragon or sage leaves, or 1 teaspoon dried tarragon or sage, crumbled
Salt and freshly ground black pepper
1/2 cup chopped scallions
1/2 cup chopped fresh parsley leaves
Melt butter over medium heat in a large, deep skillet, Dutch oven or casserole. Add onion and cook, stirring, until it softens, about 5 minutes. Add nuts and cook, stirring almost constantly, until they begin to brown, about 3 minutes.
Add breadcrumbs and tarragon or sage and toss to mix. Turn heat to low. Add salt, pepper and scallions. Toss again; taste and adjust seasoning if necessary. Add parsley and stir. Turn off heat. (You may prepare recipe in advance up to this point; refrigerate, well wrapped or in a covered container, for up to a day before proceeding.)
Pack into chicken or turkey if you like before roasting, or roast in an ovenproof glass or enameled casserole for about 45 minutes, at 350 to 400 degrees; you can bake this dish next to the bird if you like. (Or you can cook it up to 3 days in advance and warm it up right before dinner.)
Tip: To make the breadcrumbs, tear bread into chunks and put them in the container of a food processor; you may need to do this in batches. Pulse until you have coarse, irregular crumbs, no smaller than a pea and preferably larger.
- By Mark Bittman
Stuffing With Leeks, Mushrooms and Bacon
Time: 2 to 2 1/2 hours
Yield: 8 to 10 servings
Discord swarms around the issue of stuffing. Should it be cooked in the turkey or baked alongside, as dressing? White bread or cornbread? Firm enough to slice, or soft as pudding? Call this recipe the peacemaker, because it's adaptable enough to make everyone happy. You can use white bread or cornbread (and gluten-free cornbread works perfectly). The mushrooms allow vegetarians to lose the bacon without sacrificing all the flavor. We advocate baking it separately (which technically makes it dressing), but if you want to stuff the turkey, you can do that, too.
3 tablespoons melted butter, more as needed for greasing pan
1 1/2 pounds sliced white bread or cornbread
1/2 pound thick-cut bacon
2 large leeks, trimmed and sliced (3 cups)
1 1/2 pounds mixed mushrooms, cut into bite-size pieces
1 1/2 teaspoons kosher salt
3/4 teaspoon black pepper
2 tablespoons chopped sage
1/2 cup dry white wine
1 1/4 cups chicken stock, more as needed
1/4 cup apple cider, if using white bread
3 tablespoons chopped parsley
Heat oven to 250 degrees. Butter a 9-by-13-inch baking pan. Trim the crusts from the white bread and cut into 1-inch cubes; if using cornbread, coarsely crumble it. Spread the bread pieces out on one or two large baking sheets. Toast in the oven, tossing occasionally, until very dry, about 30 minutes for white bread, 1 hour for cornbread. Transfer to a large bowl to cool. Increase oven temperature to 375 degrees.
In a large skillet over medium-high heat, cook the bacon strips until crisp. Transfer to a paper-towel-lined plate to drain, leaving the fat in the pan. Add the leeks to the bacon fat and cook, stirring occasionally, until soft, 5 to 10 minutes. Add the mushrooms, 1 teaspoon salt and 1/2 teaspoon black pepper. Cook, tossing frequently, until mushrooms are tender and most of their juices have evaporated, 10 to 15 minutes. Stir in the sage and cook 1 minute. Add the wine and cook until it evaporates, about 2 minutes.
Spoon the mushroom mixture over the dried bread. Stir in stock. If using white bread, stir in the cider. Add parsley, 1/2 teaspoon salt and 1/4 teaspoon pepper. The mixture should be moist and very soft. If you like your stuffing extremely moist, add enough stock to make it seem slightly soggy but not wet. (Think pudding.) Crumble bacon and stir it in.
Transfer the bread mixture to the prepared baking pan. Drizzle 3 tablespoons melted butter over the stuffing. Bake until golden, 35 to 45 minutes.
- By Melissa Clark
Basic Cranberry Sauce
Time: 10 minutes, plus chilling
Yield: About 2 cups
Cranberry sauce should be sweet but not cloying, and tart without causing pucker and anguish. It should have a jellylike quality, but should owe more to the appearance of jam. The key element to making cranberry sauce is to understand that cranberries are high in pectin, a carbohydrate that exists in many fruits and is released by the berries when they are heated and the cells of the fruit break down. In the presence of sugar, the pectin molecules bond to one another, forming a kind of gel. The longer you cook a cranberry sauce, the more pectin is released and liquid is evaporated, and the stiffer the result will be. Science! Sometimes it's helpful. So is spice.
1 (12-ounce) bag fresh or thawed frozen cranberries
3/4 cup sugar
3/4 cup orange juice, preferably fresh squeezed
Zest of 1 orange, or to taste
Place cranberries in a small saucepan over medium-high heat and pour over these the sugar and orange juice. Stir to combine.
Cook until sugar is entirely melted and cranberries begin to burst in the heat, 4 to 6 minutes. Stir again, add zest, and cook for 2 or 3 minutes longer. Turn off heat, cover the pan, and allow to cool.
Put cranberry mixture in a serving bowl, cover, and place in refrigerator until cold, at least 2 hours, or until you need it.
- By Sam Sifton
Brussels Sprouts, Four Ways
Steamed
» To start: Slice Brussels sprouts in half lengthwise. Fill a large pot (the wider, the better: A larger surface area will help the sprouts steam more evenly) with 2 inches of water, and place a metal steamer basket on top. Bring the water to a simmer, add the Brussels sprouts to the basket, season with salt and pepper and cover. Steam until the sprouts are bright green and just cooked through, 8 to 10 minutes. Remove the lid from the pot and let them cool slightly before removing.
» To serve: Properly steamed Brussels sprouts are a great blank canvas for just about anything, be it vinaigrettes or a garlicky romesco. But nothing beats a generous pat of butter, lots of salt and plenty of cracked pepper. Should the spirit move you, anything stirred into the butter beforehand is a welcome addition (think finely grated Parmesan, chopped herbs, chili flakes or ground spices).
Sautéed
To properly sauté Brussels sprouts, you'll need a fair amount of fat. Use any flavorful fat you like, whether sausage, chorizo, olive oil or schmaltz.
» If using a meat, first brown it in a large skillet over medium-high heat. Once it's cooked, remove it with a slotted spoon, leaving the drippings.
» Add halved Brussels sprouts to the fat, keeping as many as possible cut side down. Cook until they have a nice sear on one side, 5 to 8 minutes. Give them a stir and cook until they're nicely browned and just tender on the inside, another 5 to 8 minutes. Just before removing from the heat, add in a handful of aromatics, such as chopped garlic, sliced onion or dried chilies, tossing to coat and cooking a minute or two.
» To serve: Finish these savory sprouts with a splash of lemon or vinegar, or a handful of pickled onions or shallots. Fresh herbs also work well.
Roasted
» Halve Brussels sprouts (or quarter them if they are especially large), keeping any leaves that fall away, and toss with plenty of olive oil. Season with salt and pepper, and scatter them onto a rimmed baking sheet, making sure not to overcrowd. Brussels sprouts contain a good bit of water, and if they're too crowded, they'll steam instead of brown. Roast at 450 degrees, tossing every 10 minutes or so, until the outer leaves have begun to almost char, and the innermost part of the sprout is just tender, 25 to 30 minutes.
» While they caramelize well on their own, the sprouts greatly benefit from a tablespoon or two of maple syrup, honey or light brown sugar.
» To serve: You could eat them off the tray as soon as they're cool enough, but a little patience goes far. Roasted sprouts are excellent with an aggressively flavored relish or vinaigrette. Their dark, caramelized bits play best with lemon or lime.
Raw
Brussels sprout leaves can be a little tough, so you'll need to soften them. Massage the leaves with a bit of salt, or thinly slice them.
» To massage, trim the stem off the sprouts and halve them lengthwise. The leaves should start to fall away. Once they become stubborn, trim the stem until you have a pale yellow core, which is great roasted or pickled for your next Bloody Mary bar.
» For sliced sprouts, halve them lengthwise and lay them cut side down before cutting in thin strips.
» To serve: Raw sprouts love assertive flavors. Choose ingredients that deliver both, such as anchovies, grated cheeses and chopped nuts like in a salad with apples and walnuts. Lots of olive oil is a must. For balance, include something sweet (apples, pears or dried fruit) and something fresh (shaved raw fennel, lemon juice and herbs).
Sautéed Brussels Sprouts With Sausage
Time: 30 to 35 minutes
Yield: 6 servings
There's a special place at the dinner table for anything cooked in bacon or sausage fat, but Brussels sprouts pair especially well with that kind of smoky, fatty flavor. Caramelized in sausage drippings, the sprouts stay lighter than expected thanks to some quickly pickled red onion and lots of fresh parsley.
1 small red onion, peeled and cut into 1/8-inch slices
1 tablespoon red wine vinegar
Kosher salt and black pepper
3 tablespoons olive oil
1 pound Italian sausage (hot or sweet), casings removed
1 1/2 pounds Brussels sprouts, trimmed and halved
1 cup flat-leaf Italian parsley, tender leaves and stems (about 1/2 bunch), roughly chopped
Toss onion in vinegar and season with salt and pepper. Mix thoroughly and set aside.
Heat 1 tablespoon oil in a large skillet (at least 12 inches) over medium-high heat. Add sausage, using a wooden spoon or spatula to break it up into smaller pieces. Cook, stirring occasionally, until sausage is cooked through, browned and crisp, 8 to 10 minutes. Using a slotted spoon, remove sausage from skillet, leaving any fat behind. Set aside.
Add remaining 2 tablespoons olive oil to the skillet along with Brussels sprouts. Season with salt and pepper and shake skillet so that most of the sprouts land cut side down, turning some over with a fork if necessary. Cook, without stirring, until Brussels sprouts are well browned on one side, 5 to 8 minutes. Shake skillet to continue to brown sprouts all over, another 5 to 8 minutes. Add sausage back into skillet and stir to combine.
Remove from heat and add onions and any vinegar left over, tossing to coat. Season with salt and pepper, add parsley and serve.
- By Alison Roman